

Have you heard of WordPress? If you want to start a blog with WordPress, you know that first. WordPress, in its early days, was developed to work in the “blog” format, and since then it has grown into the best blogging platform par excellence. There are many other platforms that can “work” like a blog, but none with the capacity, simplicity, and originality that WordPress offers.
Table of contents hide
What is a blog?
1. Requirements to create a blog with WordPress
2. WordPress Control and Administration Panel
3. Using categories and tags in WordPress
3.1 Managing categories and tags
4. Create an article in WordPress
4.1 Publish
4.2 Format
4.3 Categories
4.4 Tags
4.5 Featured Image
4.5.1 Add media
4.5.2 Image referencing
4.5.3 Insert an image in the post
5. Configuration of post metadata with the Yoast SEO plugin
6. Publication of the message
Important notes for correct optimization and SEO
1. Plugins
2. URL
3. Titles and descriptions
4. Categories
5. Tags
Final words
What is a blog?
I'll give you an example: have you ever heard of the “captain's blog” where he usually has a book in which he writes about the adventures that happen on the high seas while sailing? Another example would be social networks. These work like a blog, on other platforms and with different functions, but basically they are a blog. Here are some simple ideas of what a blog can be.
Wikipedia offers a broader definition of what a blog is, and a summary could be something like:
A blog is a website on which one or more authors publish a series of articles in reverse chronological order (most recent that was published is the first thing that appears) in text, images, videos or a combination of format. 'between them, classified by categories and different themes, giving the opportunity to readers to participate through comments.
1. Requirements to create a blog with WordPress
It will be necessary to meet the following requirements to create a blog with WordPress:
Have a domain and a server to install WordPress . Previously recommended using a local server, but since it usually causes many problems with operating systems and some plugins do not work locally, its use is not recommended. It is advisable to use a remote (online) server with which you can perform tests. You can use the server that I recommend in the free hosting article . You can buy a domain and hosting for a year to start your project with WordPress.
Download WordPress from wordpress.org . For this article, I'll be using WordPress version 4.9.X and the default WordPress template - Twenty Seventeen.
Install WordPress on the remote server . In the article, you will have all the information to start a WordPress blog from scratch.
Once you've installed WordPress, log in with the username and password you created during installation, and navigate to the WordPress admin panel.
2. WordPress Control and Administration Panel
In the article what to do after installing WordPress, you explained in detail the basic configuration of a WordPress installation. This configuration is valid both for the use of WordPress as a page and for the blog and even if you are going to create an online store.
To create a more optimized blog, you can read the plugins of Article WordPress . I recommend configuring Custom Permalinks and Yoast SEO plugins. Read the article and learn how to create the blog entry already optimized for SEO.
3. Using categories and tags in WordPress
When you create a blog with WordPress, better understand the use of categories and tags, I will illustrate an example. While it might sound 'simple', using categories and tags correctly can make a difference in SEO and, more importantly, in the way your users feel comfortable browsing your blog (usability ).
Imagine that you are going to create a blog with WordPress that talks about means of transport. You can use as categories Cars, Motorcycles, Ships, Airplanes more generic for the classification of articles.
In the case of tags, you can use "Audi", "BMW", "Ferrari", "Renault" as they are more specific and can be used for several articles of different categories.
Start by writing an article on the premium car. The title of the entry could be: New premium cars use less fuel. You can assign it as a Cars category and as Audi, BMW and Ferrari tags.
If you notice, the category classifies the article while the tags, in addition to classifying the article, as well as the category.
3.1 Managing categories and tags
Another thing you need to know is that every time you write an article you can assign existing categories and tags. Once created, WordPress will show you the categories and tags you have already created for you to assign, although it will also give you the option to create new ones. WordPress is very versatile and functional .
We return to the previous example. You now want to create an article about motorcycles. You cannot assign the category "cars" because it has nothing to do with motorcycles, but you can create a new category which is motorcycles. As for the tags, you can assign the tag "BMW" that you used for the automotive item, because BMW, in addition to cars, also sells motorcycles. In addition, for example, you can create other new labels such as "Yamaha", "Honda" and "Suzuki". As with tags, several categories can be assigned to the same article .
The main function of categories is to organize posts into sections at the same time that you can use them in your blog menu. Tags work like "internal links" which allow articles to be linked together by topic and, their "good use" is recommended in SEO. Recommendation : do not abuse the use of labels as you could be penalized.
4. Create an article in WordPress
Continuing with the previous example of premium cars, create the post and assign the categories and tags to it.
In the WordPress admin panel, go to Articles >> Add New. Know the new WordPress Gutenberg block editor .
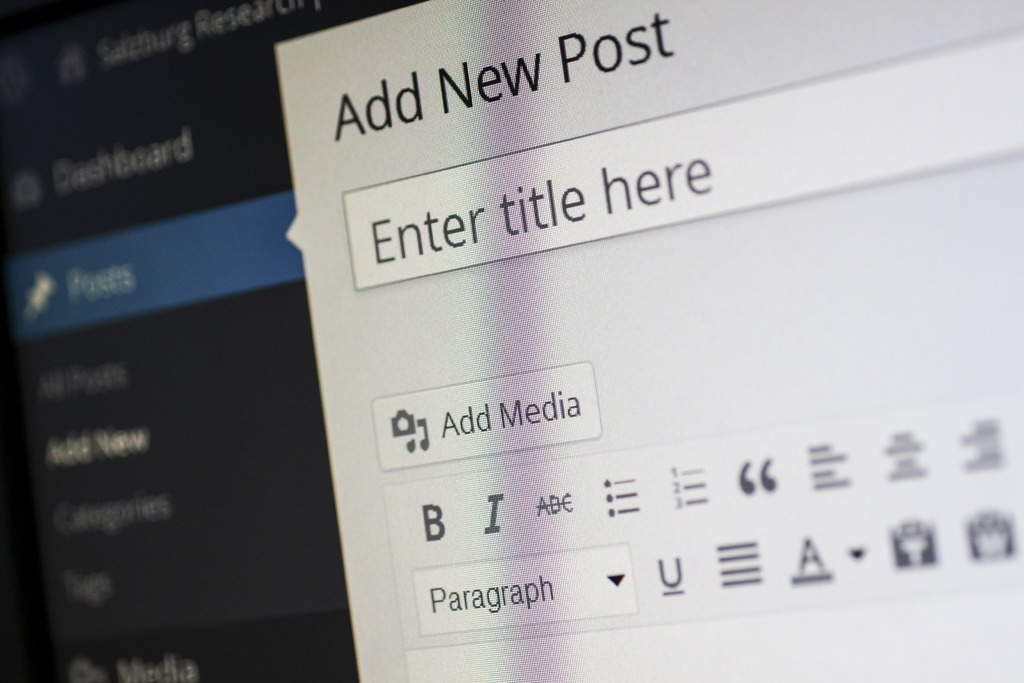
Write the title New premium cars consume less fuel in the Enter title here field . If you notice, under the title field, WordPress isn't showing you anything. In this space should appear the URL of the page but, until you enter a title, WordPress will not show you anything since by default it will assign one linked to the title.
You would have something like this:
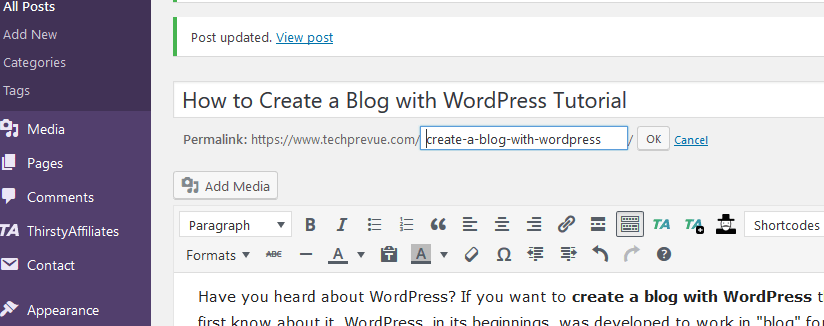
Note that under the title a new field has appeared, Permalink, which will be the friendly URL that WordPress assigns to the post based on the title. Also, in the Yoast SEO box, the title has been added and shows you how it will appear in Google results. On the right side of the screen, you will see the following sections:
4.1 Publish
This box controls how the post will be published when you create a blog with WordPress. You can save the article as a draft before you publish it, you can make it public, private or password protected and you can change the publication date (earlier than the date you wrote or later if you want to schedule its publication on another Date).
4.2 Format
Controls how the content of the entry will be displayed. You can get more information at https://codex.wordpress.org/Post_Formats . By default, the standard format type is used.
4.3 Categories
By default, WordPress comes with an "Uncategorized" category, which cannot be deleted but can be edited. This is assigned to the entry if the author has not created or assigned any category for the post, as it makes no sense that there is a post without an assigned category.
4.4 Tags
This is where you will create and / or assign the tag (s) to the entry. It is not mandatory to use them, but it is highly recommended.
4.5 Featured Image
This is where you'll download the main article image. It is usually displayed in the list of blog entries or categories as can be seen in the Blog section. Depending on the type of template you are using, this image may appear in one way or another.
Continuing with the example, leave the first two boxes as default and in Categories click on " + Add a new category ", type Cars and click on the Add a new category button. You will see the new category created in the category list and checked.
In Tags, type Audi, BMW and Ferrari separated by a comma as shown and click on the Add button. You will see that these labels now appear in the box.
Then go to the WordPress text edit box. In the HTML and CSS for WordPress article, I detail how to write with this text editor.
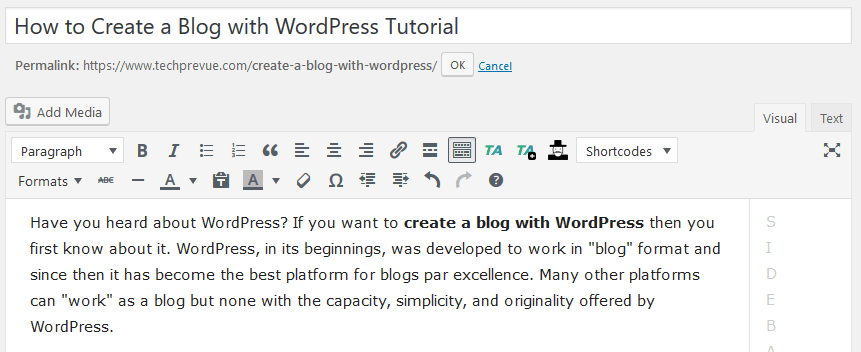
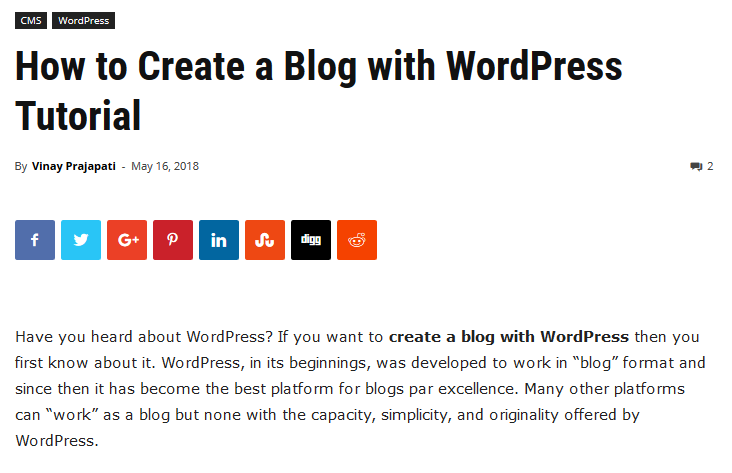
Start writing the contents of the entry, and it will look like this:
Once you have the content written you will see that something more is needed, an image! Find an image related to the content. Find yourself on the part of the content where you want this image to appear. It can be between the first and the second paragraph.
4.5.1 Add media
You will see that there is a button above the WordPress text editor, Add Media. Click the button and you will see the following:
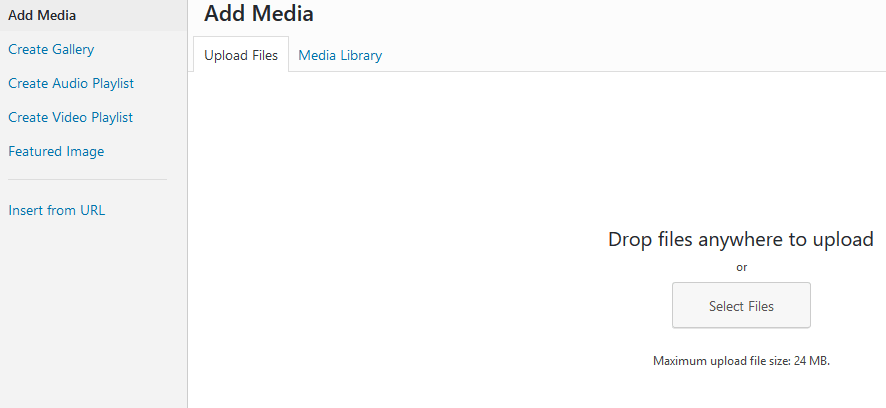
You select it from your PC and drag it onto the WordPress screen.
You click on the “ Select Files ” button , browse for it on the PC and download it.
Very important: before uploading an image to WordPress, it is recommended to name it taking into account the following rules:
Let the title be written in all lowercase letters. Try to match the title of the article: new-premium-cars-use-less-fuel.jpg.
The image has a JPG extension. These are images of a smaller size than PNG and help with page load speed, although PNG images have higher resolution.
Let each word be separated by dashes (no spaces) and no accents (accents).
That no word contains symbols or special characters like the letter "ñ". If a word has "ñ", you can write the letter "n" instead.
Once you have done one of these 2 actions, you will see something like this:
4.5.2 Image referencing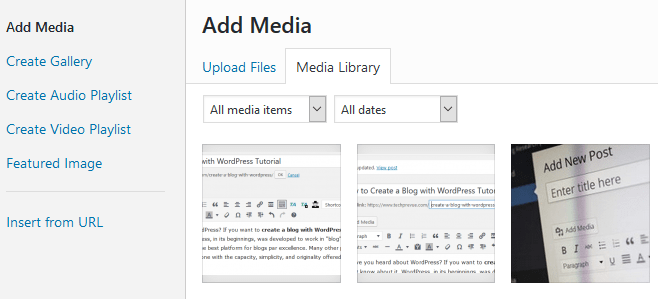
Before inserting the image into the article, you will see other fields that you should take into account:
Title: By default it shows you the name you gave to the image. You can change it to a title that matches the content of the message.
Alternate Text: This field is the most important because it's called the ALT tag, which is a parameter of images that should always be considered for SEO and that Google really likes. You can read the article on titles and alt tags, which is one of the Google webmaster guidelines that you should follow. You can write the same as in the title.
Alignment: you can leave it as you want.
Linked to: I recommend that you do not link it to anything to prevent the image from being indexed by mistake or in the future it will be deleted and generate a 404 page in the blog; Google is not like that.
Size: try to use a more or less suitable dimension so that the image does not leave the margins of the space designated by the template. You can resize the image before uploading it.
4.5.3 Insert an image in the post
Once these points are clear, click on the Insert button in the article. You will see how your image now appears in the text field with the text you wrote earlier. Now go to the Featured Image sidebox and select the same image you just uploaded.
The following will be the URL. The most likely thing is that WordPress assigned the following URL: new-premium-cars-use-less-fuel /.
It is important to keep in mind that words are separated by dashes. Never leave blank spaces in a URL as they will be misinterpreted by browsers and do not write words with accents (accents) in a URL even if they are in the title.
Also, do not use any symbols or special characters such as the letter “ñ”. If a word carries "ñ", use the letter "n" instead. Let WordPress do its job.
If you look at the URL, it is very similar to the title. Google recommends that URLs be as short as possible but precise at the same time.
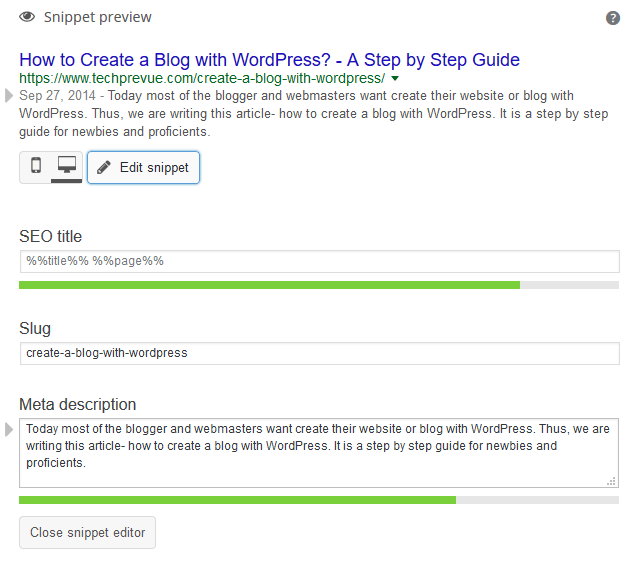
5. Configuration of post metadata with the Yoast SEO plugin
Finally, you need to assign the metadata in the Yoast SEO plugin. In the Yoast SEO area, click the Edit Snippet button and you will see the following fields:
SEO Title: Yoast SEO will assign the same entry title, so it's best to leave it blank.
Slug: This is the URL of the post that will be assigned to the plugin once you publish it.
Meta description: write a meta description for the message. Try not to exceed the 240 to 360 characters displayed by Google in your search results.
The first and third are the most important areas for good SEO. Keep in mind that SEO Title and Meta Description is what Google shows in search results, and these depend on whether or not your post is positioned correctly.
In the SEO for WordPress article, you have a complete guide to setting up SEO on your blog.
After configuring all of this it would look like this:
6. Publication of the message
Check that everything is set up correctly, you wrote your article correctly and check the spelling of the text. Click the Publish button and the entry will be published. Then in the "Permalink" field, you will see a View Message button. Click this button to see the result in the WordPress Front End.
Now that you have published your post, go to the Messages section, and you will see that the entry created with all its parameters appears.
Important notes for correct optimization and SEO
As I mentioned in the previous points, it is important to respect certain rules that Google indicates in its guidelines for webmasters for the good positioning of your articles and your blog in general. Google brings up several important rules, but there are details that escape, but they are still important, and I'll tell you here.
1. Plugins
At the start of the article, I recommended that you work on installing WordPress on a remote server, using Custom Permalinks, and Yoast SEO plugins which are more than enough for a good SEO for your blog.
2. URL
You have already seen that when creating the entry and thanks to the Custom Permalinks, it is possible to assign a custom URL. This is important to keep in mind - do not use accents in words, separate words with hyphens (-) without leaving spaces, and do not use special characters or the letter "ñ".
3. Titles and descriptions
With the Yoast SEO plugin, you can assign a title and description to position your entry. Keep in mind, don't go over the character limit. The plugin will automatically tell you when you exceed the characters.
4. Categories
When you have created the "Cars" category, WordPress by default creates a URL for this category / cars /. Note that you have prefixed the category / prefix before the category name. This is done to avoid repeated URLs which are PROHIBITED by Google and their existence is unnecessary.
Now, it's okay for WordPress to use this prefix before the name of each category you've created, but it's not pleasing for positioning and doesn't look great. Thanks to the magic of Custom Permalinks, it is possible to clean up the URL of categories as follows:
· Go Articles> Categories in the WordPress dashboard
· You will see a list of the categories you have created. Click on the category you want to change. In this case, Cars.
· In the Custom Permalink section, you will see that it shows you the domain and the next field, category / cars /, is what you are going to edit. Delete the category / so that only cars remain / which will be the final URL. Be very careful when performing this action as you might repeat some categories or even worse confuse a category URL with an entry.
· Click Update to change the category URL.
5. Tags
It works the same as with categories but prefixing the tag. The editing procedure is exactly the same as for categories, although changing the URLs of the tags is not very important. You can leave them as is.
When it comes to SEO, it is highly recommended that you do not index tags because each tag creates a URL, which can lead to duplicate content on your blog, which Google penalizes. So in summary, don't index the tags. You can do this through the Yoast SEO plugin or any other SEO plugin you use.
Final words
You no longer have an excuse to start blogging with WordPress. There are a lot of details and configurations, but it is worth doing them. Keep in mind that there is no point in writing a blog to share it if no one knows it exists. Using “SEO magic”, following Google's basic rules, and using social media, you can market your blog to people in many parts of the world.


0 Commentaires